Showing posts with label Oahu. Show all posts

Thursday, March 14, 2013

The Waimano Tunnels and Ridge Trail -- a perfect adventure for kids


Checking out the hike with an eye for fun:

I recently tried out the Waimano Tunnels hike to see if it would be appropriate for my 9 year old daughter. I'll be back on Oahu with her this summer and I want to take her on some hikes. Based on my experience, this should be an excellent adventure for her.

The hike traces the path of an old irrigation system that consists of ditches, flumes and tunnels. It's cool that the tunnels are old and have historical significance. There are 10 or so tunnels along the trail -- each one, its own mini adventure. Be sure to bring a flash light though, as some of the tunnels are rather long and windy. They're tough to navigate without a light. Not too small and not too big either. Perfect for kids.

The hike is just over about 5 miles long -- round trip (for the tunnel section of the trail). This 'tunnel' part of the trail corresponds to the beginning section of the longer Waimano Ridge Trail. If you don't turn around at the right spot, you'll happily continue past the last tunnel, up the ridge trail. In fact, we did this during our hike. In the end, we hiked a good hour beyond the last tunnel up onto the ridge, heading toward the Ko'olau ridge line. The hike and views were lovely, but more than we planned for. In the end, our 5 mile hike turned into a solid 8 miler -- taking about 4.5 hours, with time for tunnel scrambling and lunch.

If you stick to the beginning section of the trail and take time to explore the tunnels, you can probably finish the hike in about 3 hours. The trail itself is mostly flat with a slight uphill ascent -- just what you'd expect from a trail alongside an irrigation duct. Just right for kids. We did have to hike for a while before we finally came to our first tunnel.

Where to turn around:

So how do you know when to turn around? It's easy, if you know the trick. Just look for these landmarks and follow these directions.

At some point along the trail (about 2 miles in; after a good number of tunnels), the trail crosses Waimano stream. Immediately after that you'll see an odd kind of trail sign with two arrows -- one points to the left, one points to the right. You can't miss it. It's right in front of you. (Sorry no picture).

Follow the path to the left. This will immediately take you through two more tunnels. These are the best tunnels on the hike. Continue on the path through both tunnels. After that second tunnel, you'll pop back out of the ditch and up onto the trail. If you continue on the trail up and to your right, you'll continue up the ridge trail toward the Ko'olau ridge line. If you follow the trail to your left, you'll end up circling back around and over the tunnel you just came through to a picnic area. Continue on the trail from the picnic area. This takes you back to that 'dual-arrow' junction you encountered just after crossing the stream. From here, just follow the trail back to the trail head. That's pretty much all there is to it.  

Of course, the tunnels are main attraction for this hike, but it's also loaded with goodies that should appeal to kids. In one spot, the trail is a little sketchy with a slight drop off. It's equipped with a rope to help the hiker feel safe as they scramble across a somewhat narrow, rocky ledge. Compared to many hikes on Oahu, this is pretty tame. However, it adds to the adventure for kids.

Also, the natural beauty is terrific. There are thickets of Hau trees that make excellent jungle gyms; and plenty of tropical plants some of which yield tasty fruit. We enjoyed a Liliko'i (Passion fruit) we found along the way, and the Java Plum were also abundant -- if you can handle the pucker.

Overall, this is a terrific day hike, especially for kids.

 How to get there from Honolulu:

Getting there from Honolulu is super easy. Just take H1 West toward Pearl City. (Note: once on H1 you can either stay on it the entire way or take the H201 short-cut and rejoin H1 later). Then take Exit 10 off H1 to Pearl City. Follow the exit, keeping to the right, and merge onto Moanalua Road. Follow Moanalua Road about 0.7 miles and take a right onto Waimano Home Road. Follow Waimano Home Road, up the hill about 2.5 miles until it ends (at a gate/restricted area). Park on the left side of the street. The trail head is just along the fence on the left side of the road.

Getting Started:

At the trail head there are two paths, the 'upper' path and the 'lower' path. The upper path (rightmost) follows along the fence for a while then joins up with the tunnel system. The lower-path heads down to the stream, then works its way along the stream until it joins up with the upper path later. On my trip, I stayed on the upper path.

Some pics:

Here are some pictures of the hike. 

The trail head.

The Java Plum were bursting with fruit.

A thicket of Hau branches. They scream to be climbed on.

A blossom from a Hau tree.

The entrance to a tunnel.

Hanging out under a fan palm.

The nasty thorns on the frond of a fan palm.

The entrance to another tunnel. Kind of scary looking. 

Cathie inside a tunnel. Her shoes reflecting my camera flash.  Sometimes the tunnels were damp, but this one was dry.

Cathie emerging from a tunnel.

A nice orchid we saw along the way.


A nice Lantana.

Me emerging from one of the tunnels.

The seeds/nuts of a palm tree.

A closeup of the funky seed/nut holders on a palm tree.

Looking up the Waimano Valley toward the Ko'olau Ridge. 

A Liliko'i (passion fruit) we picked up along the trail. It was tart, but good. 


Monday, December 17, 2012

Hiking the Wa'ahila Ridge Trail to Mount Olympus

Yesterday, Cathie and I climbed the Wa'ahila Ridge Trail to the top of Mount Olympus. By now, we've done a good number of hikes on Oahu, including Haiku Stairs, Kuli'ou'ou Ridge, Manawili Falls, among others. I have to say, this one is now one of my favorites. If you go all the way to Mount Olympus you end up right on the ridge of the Ko'olau range and get terrific views of a big chunk of the Island. Swinging from East to South you can see Waimanalo, Rabbit Island, Koko Head, Ka'au Crater, Diamond Head, Manoa Valley and Honolulu.  Continuing West and North you see the Ko'olau Range, the Manawili Basin, to Kailua and around again to Waimanalo. Fantastic views.

Mt Olympus, as seen from our condo near Ala Moana.


We started out by driving up through St. Louis Heights to Peter Street, pretty much as far as the road would take us. At the corner of Peter and Ruth we took a left onto Ruth and followed it into the Wa'ahila Ridge State Recreation Area.

When we started out, our plan was to do the Wa'ahila Ridge Trail only, having heard that the upper trail was more advanced and technically closed. The main hike is about 3.5 miles round trip and is supposed to take an hour and 45 minutes.

Once we hit the 'end of the trail' marker we were feeling good, so we decided to push on. As we proceeded, we felt OK, so we cautiously continued. Before we knew it, we were there.

The hike was a challenge in places, but overall, pretty safe and manageable. At times the trail was steep and slippery. This was disconcerting and a little tense, but somehow we got by. Also, it was windy and in places, the wind absolutely roared over the ridge. At these points we hunkered down and scooch along the trail. In the end, our leisurely hike took a little more than 4 hours. We were tired, but very satisfied.

Here are some pictures with comments.

The parking lot at Wa'ahila State Recreation Area. Here there is a nice mix of Cook Pines and Ironwood trees.
All along the Wa'ahila Ridge there are groves of Strawberry Guava.

On this day, many were ripe and still on the trees -- in spite of the wind.

We feasted.

They're delicious! If seedy. 

Like so many hikes on Oahu, the views and vegetation are lovely.

A yellow Ohia flower


There were plenty of red Ohia too.

An octopus (aka rubber) tree. This one is unusual in that the fruit appears black. I've ever only seen it red before.

A view of Manoa Valley, with Honolulu in the distance, from Wa'ahila Ridge

The "End of Trail" Marker for the Wa'ahila Ridge Trail.

We felt good when we reached this point. The ground was damp, but not too slippery and the weather favorable, so we decided to push on a little further.

Cathie using a rope to get to the top of a knoll.

There were a half dozen places along the trail where ropes came in handy. In some spots, climbing without a rope would be treacherous  if not impossible -- especially in bad weather. On this day, the ground was muddy and slippery and we needed the ropes. We quickly learned the rule: One person at a time on the rope! Oops. Sorry about that.


A panoramic view South from the upper reaches of Wa'ahila Ridge.

As we continued onward and upward along the Wa'ahila Ridge it merged into the Ko'olau Range's main  ridge (the backbone). From here looking back southward we could see the Wa'ahila Ridge itself behind us (center, left in above picture), Manoa Valley (center right), with Diamond Head and Honolulu in the distance.

Taking a short break before making the last push to the top, Cathie with Mount Olympus in the background.
Near the upper end of the Wa'ahila Ridge, the trail opens onto a nice grassy spot. This was a good place for a rest, a snack, and a drink before making the push for the top. From here there are 3 additional knolls to climb to reach the summit.

Eventually the Wa'ahila Ridge meets the Ko'olau Range's main ridge. From here, we got a nice view along the ridge line and views of the windward side of the island.

A view of the cliffs leading down to the Manawili Basin 

The summit marker
The summit of Mount Olympus is more or less covered in vegetation. The summit itself was marked rather inauspiciously with a pink ribbon. We walked a bit past the summit, where the ridge trail opened up to expose wonderful panoramic views.

To the North, North-East you can see the Ko'olau Range Ridge, Manawili Basin and Kailua in the distance

Looking South-East you get a nice view of the Ko'olau Ridge looking toward Kuli'ou'ou.
(Hey, what's with that bald spot!)


Swinging to the South-South-East you can look down into Ka'au Crater.

Looking South you can see Diamond Head and Honolulu in the distance, and Wa'ahila Ridge (center, right) and Manoa Valley (right-edge) in the foreground.

The trail continues beyond the summit. After maybe 100 feet, it drops steeply down, following the ridge line. If you keep going, it appears that you may be able to walk the ridge all the way to Kuli'ou'ou. However, this is where we stopped and headed for home. We still had a couple hours ahead of us and by now it was mid-afternoon.

We were a little tired, so we took our time working our way down.

Cathie using the rope to descend a steep, muddy section.

It was a little intimidating because it was slippery and steep.... 

...and long. In some places you had to traverse 2 or 3 ropes in a row. 
Eventually, we made it back onto the lower section of Wa'ahila Ridge. We were no worse for the wear, just a little muddy with and a few scratches. The mud came from the ropes, and the scratches from the brush along the trail.

Mud and scratches from the hike. 

At this point, we resolved to go to Ailana's for shave ice once we got home. That promise powered us the rest of the hike.

Back at the parking lot.
Boy were we glad to get back to the parking lot. We were tired, but satisfied. Very satisfied. What a great hike. Now, on to Ailana's! Yum!!

Recommendations:

If you go, I recommend that you:
  • Bring the following:
    • Water -- we had water and stopped a few times to hydrate.
    • Food/Snacks -- While the Strawberry Guava gave us a burst of energy, don't count on them being available. We also had Spam musubi and fruit to munch on. 
    • Gloves (optional): Some folks might want gloves to protect your hands from the ropes. Personally though, I probably prefer to go without.
    • Leg coverings (optional): As you saw, your legs can get scratched by all the brush along the trail. You may prefer to wear long socks or pants to protect your legs. Me? Nah.
  • Watch the Weather: We had good conditions, but the trail was still damp and quite slippery in places. Don't let a rainstorm move in on you while you're up top. You might just get stuck, as the trail could become quite dangerous when soaked. Also, if it's cloudy the view may suck.
  • Have fun. :)

Friday, May 4, 2012

Climbing the Haiku Stairs (Stairway to Heaven) - Oahu, Hawaii


Update on Haiku Stairs (3/15/2015): 

Please note: On February 8th 2015, a powerful storm blew over the island, triggering a landslide that wiped out part of the Haiku Stairs. By all accounts, the stairs are now extremely dangerous, if not absolutely impassable. On the day of the storm, five hikers became trapped on the stairs and had to be rescued. In the days that followed, another young hiker went missing. As of today (more than a month later), he remains missing. Here are a few links to information on the storm and associated damage:

If you are thinking of climbing the Haiku Stairs, may I suggest one of the other many fantastic hikes that can be found on this beautiful island? If you're seeking a thrill, consider climbing Olomana. If you're looking for a fantastic view, consider hiking the Wa'ahila Ridge Trail to the summit of Mt. Olympus. What ever you do, have fun (and be safe)!
Mahalo,
-Steve


Yesterday, Cathie and I climbed the Haiku Stairs (aka "The Stairway to Heaven"). The climb offers an incredible aerobic workout, a look back at some World War II history, and absolutely terrific views of the Ko'olau Mountains and the windward side of Oahu.


Part of what makes this hike an adventure is that the trail is forbidden. The stairs are technically closed to the public and secured by a (friendly, but firm) guard who keeps people away. To make the hike, we had to sneak past the guard station at the base of the trail. This was accomplished by arriving in the wee hours of the morning, before the guard got there for the day.

The first time we attempted the hike, last year, we got to the trail head at 5 am -- after getting lost trying to find the place. The guard was there and turned us away. This time, we arrived around 3:30 am and managed to get by. Rumor has it the guard arrives around 4, but he wasn't saying for sure one way or the other.


"Oahu Revealed" by Andrew Doughty has a nice description of the Haiku Stairs, their history and their politics. Here are a few factoids.

  • The hike is comprised of 3922 stairs, is about 2 miles long, and climbs 2200 feet in altitude.
  • The stairs were built in WWII to support an anchor tower for a mile-long ultra-powerful radio transmitter that was supposed to be used to communicate with ships as far away as the Indian Ocean.
  • The original trail was lined with wooden ladders. These were later replaced with wooden stairs, then metal ones.
  • The trail was closed in 1987 due to vandalism. Repairs were made in 2005, but attempts to reopen the trail failed due to intra-government squabbling. 
What follows is a brief chronology of our hike, supplemented with an abundance of pictures. I hope you enjoy them.

-Steve


Disclaimer: The photos below are organized as if hiking from the bottom to the top and back down again. In reality all these picture were taken on our descent. It was pitch black during the our ascent. In retrospect, I wish I had taken at least a few pictures (with flash) on the climb up. Oh well. Next time.

We began our day by waking up at 2:15 am. We left our place near Ala Moana around 2:30 and arrived at the "unofficial" parking area -- in the Haiku Village residential neighborhood -- around 3. We tried to be as quiet as possible, so as not to disturb the neighbors. We came across a pair of women who also were going to make the hike. While they waited for a friend to arrive, we pushed on.

We followed our instructions to reach the trail head. This time, we knew where to go, after getting lost last time. We hiked in the dark according to our instructions -- through fences, up roads, through forks, down trails, etc -- until we reached the trail head. We turned on our flashlights only twice to check our instructions.


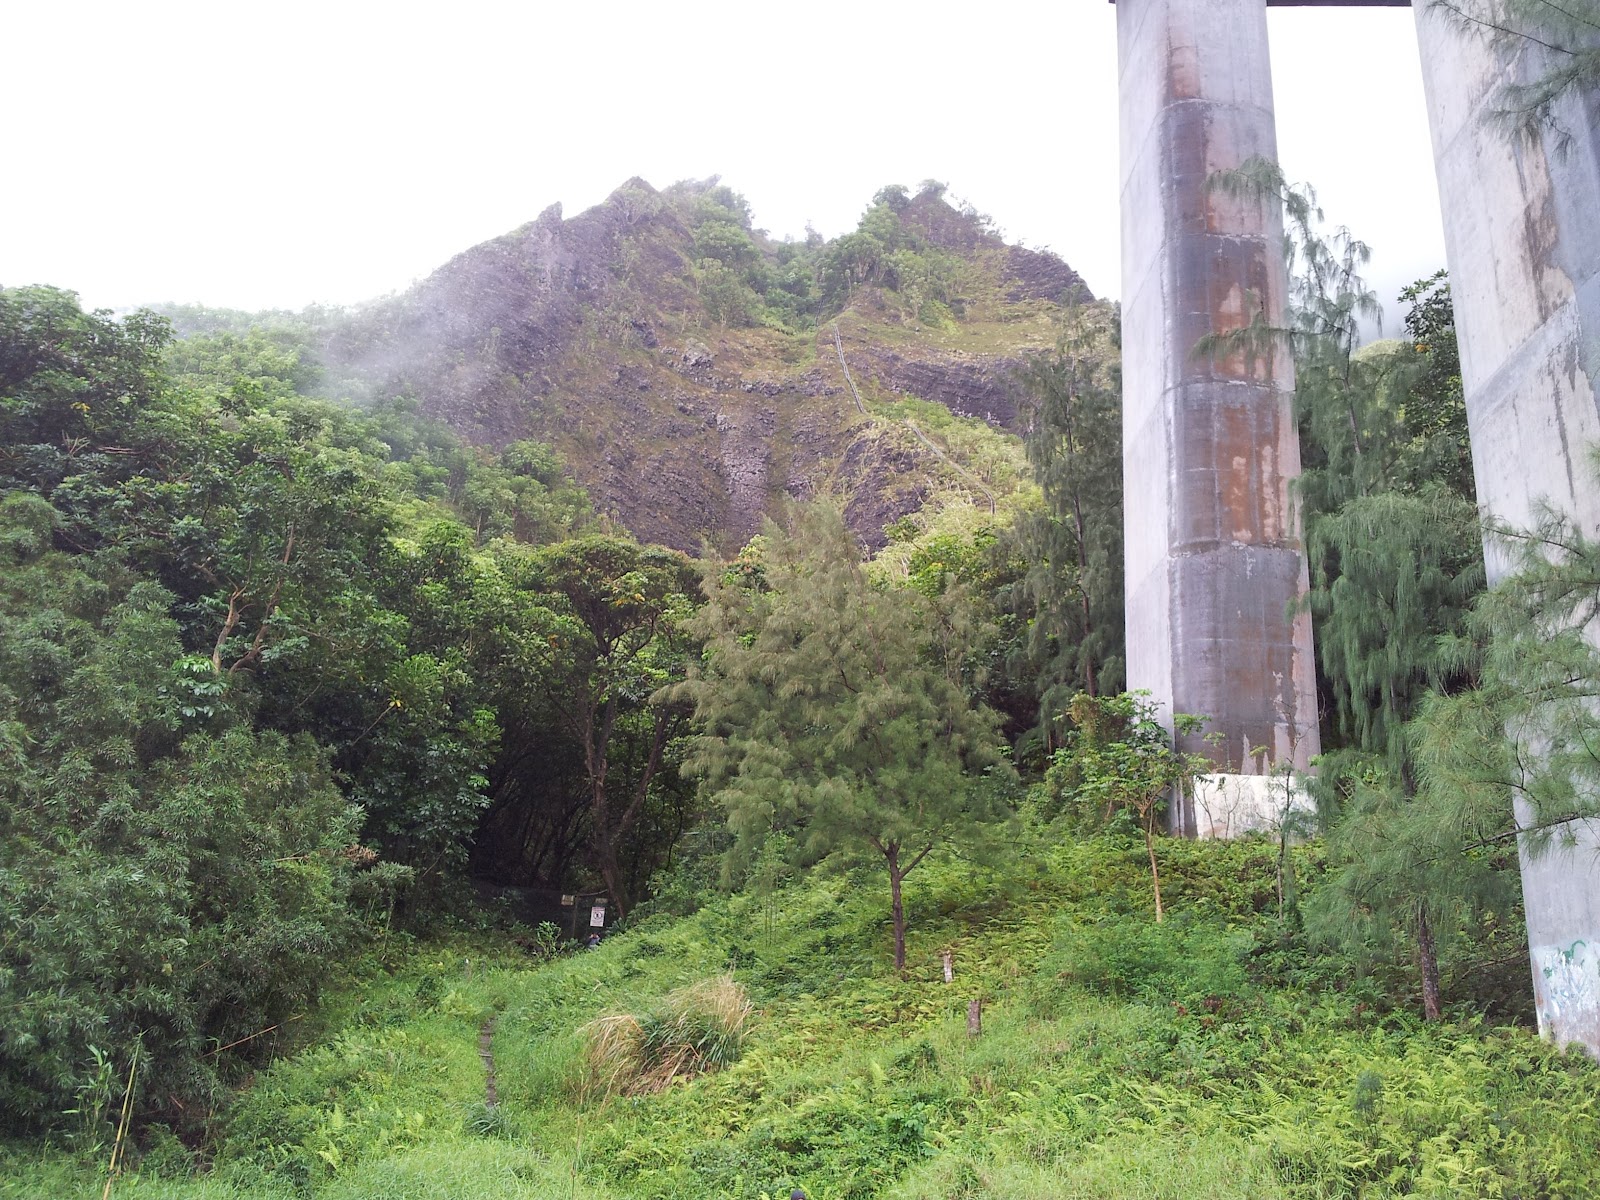
The trail head to Haiku Stairs is under the H-3 highway, in a fenced off area with "No Trespassing" signs on it. At the base of the stairs is a small blue tent, where the guard stays during the day.

When we got to the trail head we were happy to see no one. No guard. We started up the trail in the dark, worked around two fenced gates, and finally got onto our first set of stairs.


 The stairs were steep and it was dark. However, once our eyes adjusted to the darkness we could more or less make out the next step in front of us. The sky was overcast, but there was a near-full moon, so we had some ambient light to guide us.


When we first started, I was taking two steps at a time. That lasted for about 3 minutes. My legs started to burn and I settled into a slower, steady, one-step at a time pace.


The stairs are comprised of segments. Each segment consists of seven steps. I discovered this as we climbed, while trying to think of anything but my legs. We climbed at least 150 segments (> 1000 steps) before reaching the first platform. I don't know the exact step count, but getting to the first platform was the longest leg of the hike for sure.


We climbed in the dark without flashlights since we'd been told that the guard will climb up to fetch you, if he sees your lights.

By the time we reached the first platform, I was drenched in sweat. We rested, drank water, and had a snack. Then, we continued on in the dark.


There weren't too many flat spots, mostly steep spots and very steep spots. In some places the steps were more ladder than stairs.


 In most places the vegetation grows up and around the steps.


Cathie found, and I ate, a wild Hawaiian Raspberry. It was yummy.


There was beautiful vegetation all around. Here is a nice fern. We also saw wild orchids, yellow moss, octopus (rubber) trees, and more.... all on the way down.


 Did I mention there are a lot of stairs?


At another platform, there was a structure that was used as a way-point for hauling equipment to the top. It was covered in graffiti, some of which is nice. We took a short rest here as well.


I wondered how they managed to get all this equipment up there in the first place.


There was more hauling equipment, and ...


... encouragement to keep going.


The stairs continued to climb.


At some points, we had to hold the underside of the rails to keep from falling backwards.


The stairs inevitably led into the clouds, where it was cool (cold by HI standards) and wet. When it wasn't misty, it rained. And in places the wind blew hard. It was disconcerting in the dark.


Eventually, we reached the top. It was about 5 am and still dark. The ascent took about 1.5 hours. At the top there was a small cement bunker, with a couple of dish antennas on the top. (Note: The picture above, was taken around 5:45, just before dawn, on our way down).


We waited for dawn in the bunker with a handful of other hikers. We were cold and wet, but the food was good and the company friendly.


A little before dawn, we decided to head out. It was blowing and raining.


We worked our way along the ridge, down out of the clouds.


In spots, the descent was steep, like going down a ladder backwards. It was kind of freaky. In this picture, you can see H-3 far below.


We found more inspiring messages at the way-station.


Thankfully, coming down was easier than going up. As we dropped below the clouds we dried off and warmed up.


We still had a long way to go. But, we took our time, enjoyed ourselves and took plenty of pictures.


We got a good view of the H-3 Tunnels from the ridge.


Neither Cathie, nor I slipped once during the hike. Even though the stairs were wet, we never seemed to have a problem with traction.


The flowers were beautiful. This one is called Lantana.


 ... more stairs... steep in spots.


We got on intimate terms with the stairs both climbing up and coming down.


Finally, we came over the last hump and could see H-3 and the trail head below. If you look closely at the picture above, you may be able to spot the guard standing in the clearing, under H-3, just to the left of that central pillar.


 We dropped below H-3, toward the trail head.


The guard greeted us when we got back. "Hello Trespassers," he said. He was friendly and pleasant. It was about 8 am, 4.5 hours after we started.


Rather than retrace our steps back to the car, we went in the direction suggested by the guard. Somewhere we took a wrong turn and ended up wandering through a thick grove of bamboo. Hidden beneath a large rusted out barrel, we came across a nest full of bird eggs. Pretty cool.

We eventually found our way back to the car.

Overall, it was a terrific hike -- a great way to start the day. Disclosure: After returning home later in the day, we both took long naps. :)

If you want to go, this is what I recommend:
  • Start early. Plan to be at the trail head by 3:30 am or so. Be quiet when parking and walking to the trail head. Respect the neighborhood.
  • Know how to get to your parking spot and the trail head. We had solid directions, based on our notes (from Yelp) and knowledge gained from our first failed attempt.
  • Bring the following items:
    • Food and Water -- you'll need the energy and hydration.
    • Gloves -- to protect your hands. We used weight-lifting gloves and they worked great.
    • A poncho or rain gear (and perhaps a long-sleeve shirt) -- Supposedly, the top is almost always wet and cool/cold.
    • A flashlight (preferably hands-free) -- used minimally, but handy when trying to find the trail head and while hanging out inside the bunker.
    • A plastic bag -- for something dry to sit on, while you wait for dawn on top.